
This guide is written for professional installers. If you’re a business owner looking to understand what your installer should do, read this too — it’ll help you ask the right questions.
The context is Ukraine and Poland, 2026. Daily 16-hour blackouts in Ukraine. Grid-tied with occasional backup in Poland. Both markets have unique requirements that standard “western” installation guides don’t cover.
Before You Start: Understanding the Client’s Real Needs
In Ukraine, the conversation usually goes like this:
Client: “I need backup power.”
You: “For what duration?”
Client: “Until the grid comes back. It’s usually 12–16 hours.”
You: “What loads do you need to run?”
Client: “Everything. Fridge, freezer, lights, pump, internet, TV. Maybe a heat pump in winter.”
You: “And solar panels?”
Client: “Maybe later. Budget is tight now.”
This changes everything compared to a standard European install:
| Standard Install (Poland/Germany) | Ukraine Backup Install |
|---|---|
| Grid-tied, panels first | Battery-first, panels optional |
| Net metering / net billing focus | Off-grid survival focus |
| 5–10 kWh battery (peak shaving) | 15–30 kWh battery (full replacement) |
| Solar covers 30–80% of usage | Solar recharges battery during blackouts |
| Backup is a secondary feature | Backup is THE feature |
Design accordingly.
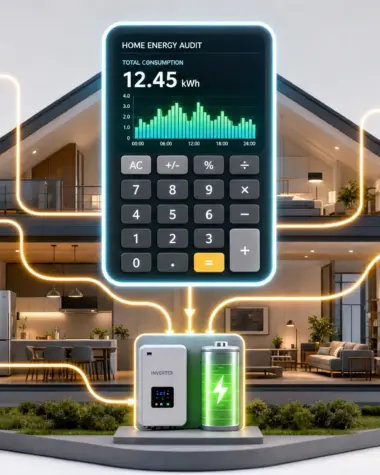
Step 1: Load Assessment (Critical)
Don’t guess. The client will underestimate their load.
What to actually measure or calculate:
| Load | How to Estimate | Startup Surge |
|---|---|---|
| Refrigerator | Nameplate: running watts × 24h / 2 (compressor cycling) | 2–3x running for 0.5s |
| Freezer | Same as fridge | 2–3x |
| Well pump | Nameplate: check LRA (locked rotor amps) | 5–7x running — biggest surge in most houses |
| Circulation pump (heating) | Nameplate: small (50–150W) | 2x |
| LED lighting | Count bulbs × wattage (typically 10–15W each) | None |
| Internet router | 20W (negligible) | None |
| Electric water heater | 1.5–3 kW | None (resistive, no surge) |
| TV / computer | Nameplate | 1.5x |
| Elevator (apartment building) | Motor + controller: 3–7 kW | 3–5x — requires soft start or 3-phase inverter |
The hidden danger: Most clients have no idea what their pump’s startup current is. Always ask. If they don’t know, install a soft starter on the pump or oversize the inverter significantly.
Step 2: Inverter Sizing (For Installers)
Rule of thumb for Ukraine backup systems:
- Size the inverter for the largest motor load + all other loads simultaneously
- Then add 50% margin for future loads
- Don’t forget 3-phase if the building has an elevator or 3-phase pump
Quick reference:
| Situation | Inverter | Why |
|---|---|---|
| Small shop, no pump, 2 fridges | Deye 5kW | Enough headroom for fridge compressor starts |
| Standard home, well pump, fridge, lights | Deye 8kW | Pump startup needs the extra headroom |
| Home + heat pump (8kW) | Deye 10kW | Heat pump compressor + house loads |
| Business + multiple pumps/fridges | Deye 12kW or 2× 8kW parallel | Redundancy + headroom |
| Apartment building (elevator + pumps) | 3× Deye 8kW (3-phase) | 3-phase is mandatory |
For Growatt installations (Poland):
- Add more margin. Growatt inverters have lower surge capacity than Deye.
- An 8kW Growatt handles less surge than an 8kW Deye.
- If the client has a well pump, recommend Deye instead.
Step 3: Battery Sizing (For Installers)
Capacity calculation for 16-hour blackout:
Total daily load (kWh) ÷ 0.85 (inverter efficiency) ÷ 0.9 (usable DoD) = Battery capacity neededExample (small grocery store):
- 3 fridges (500W avg each × 16h) = 8 kWh
- 1 freezer (400W avg × 16h) = 6.4 kWh
- Lights (200W × 16h) = 3.2 kWh
- POS + router (100W × 16h) = 1.6 kWh
- Total: 19.2 kWh
- ÷ 0.85 (inverter) = 22.6 kWh
- ÷ 0.9 (usable DoD) = 25 kWh rated capacity needed
Recommended: 2× GSL Energy 12.8 kWh batteries in parallel = 25.6 kWh
Important: If the client says “I’ll add panels later,” size the battery slightly larger. Solar changes the calculation — during the day, panels recharge the battery, effectively doubling or tripling runtime.
Step 4: Critical vs Non-Critical Load Separation
This is the most important wiring decision.
The inverter has two AC outputs:
- Backup/Load output — runs during blackout
- Grid-through output — only works when grid is on
How to split loads:
| Put on Backup Output (Runs During Blackout) | Leave on Grid-Through (Only Works With Grid) |
|---|---|
| Refrigerator / freezer | Washing machine |
| Water pump | Dishwasher |
| Heating circulation pump | Electric oven (resistive) |
| Internet router | Air conditioner (unless sized for it) |
| LED lighting (essential) | EV charger |
| POS terminal / computer | Garage door (unless needed) |
| Security cameras | Non-essential lighting |
| Medical equipment | Water heater (unless critical) |
Why this matters: If everything is on the backup output, the battery drains faster. If too little is on backup, the client complains during blackouts.
Best practice: Install a separate “critical loads” sub-panel. Wire all backup loads into it. The inverter feeds this sub-panel. Grid feeds the rest.
Step 5: BMS Communication (Don’t Skip This)
Voltage-based battery estimation is useless for daily deep cycling.
Always connect CAN or RS485 communication between the inverter and battery.
Deye + GSL Energy (Most Common Combo)
- Set DIP switches on the GSL battery to match your inverter brand
- Connect CAN cable from battery to inverter
- In Deye settings: set battery type to “Lithium” and “Pylontech” protocol
- Verify the inverter reads SOC (state of charge) correctly
Growatt + GSL Energy
- Set DIP switches on GSL battery accordingly
- Connect CAN cable
- In Growatt settings: set battery type to “Lithium” and “Pylon” protocol
- Verify SOC reading
Generic 48V battery + Any Inverter
- If the battery supports “Pylontech-compatible CAN,” it usually works with most inverters
- If not, you may need a “CAN bridge” or stick to voltage-based (not recommended)
What to test during commissioning:
- Battery reads 100% SOC after full charge
- Discharge for 30 minutes — SOC should decrease linearly
- Charging resumes correctly after grid returns
- No error codes on inverter display
Step 6: Neutral Grounding (Critical for Ukraine)
This trips up many installers.
When the grid is on, the inverter uses the grid’s neutral-ground bond. When the grid goes down, the inverter must create its own neutral-ground bond.
Deye: Handles this internally. No extra relay needed.
Growatt: Some models need an external neutral-ground bonding relay. Check the manual. If the inverter doesn’t switch the N-G bond, you’ll get floating neutral issues — and possibly electric shocks or equipment damage.
General rule: If you see “NG bonding required” in the manual, install a contactor or relay that bonds neutral to ground when the inverter is off-grid.
Step 7: Installation Safety (War Zone Considerations)
Standard solar installation safety applies. In Ukraine, add these:
Equipment Placement
- Mount the inverter and battery indoors — not in attics, not on exterior walls
- Battery on a ground floor or elevated — NOT in a basement that could flood (dam failures are a risk)
- Keep a fire extinguisher nearby — LiFePO4 is very safe, but still have one
Cabling
- Use armored cable (SWA) where exposed to potential debris damage
- Run conduits along interior walls, not exterior ones
- Label everything clearly (emergency responders may need to disconnect)
Emergency Shutdown
- Install an external emergency stop (E-stop) button near the door
- Label the location of the inverter and battery on the electrical panel
- Brief the client on emergency shutdown procedure
Documentation
- Leave a one-page system diagram with the electrical panel
- Include emergency contact numbers
- Write down the inverter’s WiFi password (clients WILL forget)
Step 8: Commissioning Checklist
Before leaving the site:
- [ ] All loads are wired to correct outputs (critical vs non-critical)
- [ ] CAN communication is connected and inverter reads correct SOC
- [ ] System switches to battery when grid is cut (test it!)
- [ ] System switches back to grid when restored (test it!)
- [ ] Battery charges correctly from grid
- [ ] Monitoring app is installed on client’s phone and connected
- [ ] Client understands how to use the system
- [ ] Emergency shutdown location is marked
- [ ] System diagram left with electrical panel
The most important test:
- Turn off the main breaker (simulate blackout)
- Verify inverter switches to battery within 20ms
- Verify all backup loads work
- Turn main breaker back on
- Verify inverter reconnects and starts charging
If all of this happens without the client noticing anything, you’ve done your job perfectly.
Common Problems and Solutions
| Problem | Likely Cause | Fix |
|---|---|---|
| Inverter trips when load starts | Surge exceeds inverter capacity | 1) Reduce loads on backup output 2) Install soft starters on motors 3) Upgrade to larger inverter |
| Battery SOC reads incorrectly | No CAN communication, or wrong battery type setting | 1) Connect CAN 2) Verify battery type in inverter settings |
| Lights flicker when switching to battery | Switchover time too slow | 1) Check inverter settings 2) Some inverters (budget models) have inherently slow switchover 3) Consider Deye if flickering is reported |
| Battery won’t charge from grid | Charging current limit too low, or grid voltage out of range | 1) Check inverter charging settings 2) Verify grid voltage is within inverter’s range |
| Inverter shows error code | Various — check manual | Common codes: grid loss (ignore if testing), fan error (clean/replace), DC bus overvoltage (recycle power) |
Estimated Installation Time
| System Type | Installation | Commissioning | Total |
|---|---|---|---|
| Small: 5kW inverter + 5kWh battery | 4–6 hours | 1–2 hours | 5–8 hours |
| Medium: 8kW inverter + 10–15kWh battery | 6–10 hours | 1–2 hours | 7–12 hours |
| Large: 10kW+ inverter + 20+kWh battery + solar | 1–2 days | 2–3 hours | 1.5–3 days |
| 3-phase: 3× inverters parallel | 2–3 days | 3–4 hours | 2.5–4 days |
Bottom Line for Installers
- Design for battery-first, panels-optional — that’s the Ukraine reality
- Separate critical and non-critical loads — always install a sub-panel
- Connect CAN bus — voltage-based SOC estimation is not acceptable for daily cycling
- Oversize the inverter for motor loads — fridges, pumps, and heat pumps need surge headroom
- Test the blackout switchover — don’t leave until you’ve confirmed it works
Recommended standard kit: Deye 8kW + GSL Energy 10–15 kWh + critical loads sub-panel. CAN communication. Tested on-site. This combo handles 90% of Ukrainian small business installations.
📌 Back to: BESS for Business — Complete Systems
📌 Reference: Deye vs Growatt vs GSL Comparison